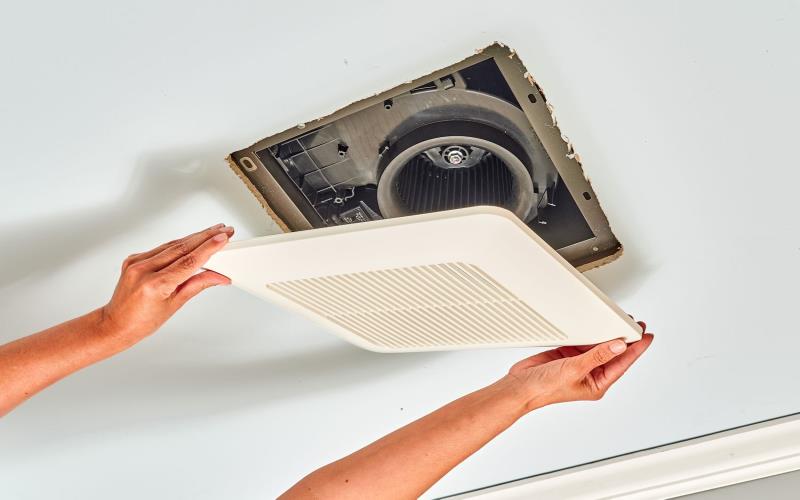
Are you grappling with issues like mold growth, rust, and peeling paint in your bathroom due to excess moisture? The solution lies in installing an exhaust fan. An effective bathroom exhaust fan not only keeps your space dry and odor-free but also safeguards against potential damage to ceilings and walls.
Ready to tackle the installation process? Let’s delve into a step-by-step guide to seamlessly incorporate an exhaust fan into your bathroom, ensuring a healthier and more comfortable environment.
Understanding Bathroom Exhaust Fans
Curious about what a bathroom exhaust fan is and why it’s crucial for your space? A bathroom exhaust fan, also known as a bathroom vent fan or extractor fan, is a mechanical device designed to draw indoor air, moisture, and odors out of your bathroom through a metal duct. If you’ve been contemplating the installation of a bathroom exhaust fan, you’re on the right track.
In this guide, we’ll walk you through the entire process, ensuring a comprehensive understanding and a successful installation for a healthier, more comfortable bathroom environment.
Preparing for Bathroom Exhaust Fan Installation
Before embarking on your bathroom exhaust fan installation journey, gather the essentials for a smooth process. Here’s what you’ll need:
- Exhaust Fan Kit: Begin by acquiring a quality exhaust fan kit that includes the fan unit, ductwork, and necessary mounting hardware. Ensure it suits your bathroom size for optimal ventilation.
- Screwdriver and Drill: Have a Phillips screwdriver and a drill ready for securing the fan in place and creating holes for the ductwork.
- Measuring Tape: Accurate measurements are crucial. Use a measuring tape to determine the correct placement for your exhaust fan, ensuring optimal functionality.
- Ventilation Duct: Select a durable and appropriately sized ventilation duct to channel moist air from the bathroom to the outside.
Now that you’ve gathered the necessary tools and materials, you’re well-prepared to dive into the step-by-step process of installing your bathroom exhaust fan for improved air quality and comfort.
Mastering Exhaust Fan Installation Like a Pro
While installing a bathroom exhaust fan may seem daunting, mastering the process is simpler than you think. Though working at heights can be tiring, the step-by-step guide below ensures a professional touch to your installation. Elevate your bathroom’s ventilation with precision and efficiency by following the below straightforward steps.
Guided Instructions for Bathroom Exhaust Fan Installation
Embarking on the installation of a bathroom exhaust fan? Follow these step-by-step instructions for a seamless process:
1. Locate the Ideal Placement:
Begin by identifying the optimal location for your exhaust fan. Choose a spot that ensures efficient ventilation and moisture removal. Typically, it’s near the shower or bath area.
2. Turn Off Power:
Prioritize safety by turning off the power to the bathroom. Locate the circuit breaker and ensure the area is safe to work in.
3. Mark and Cut Openings:
Using a pencil, mark the fan’s outline on the ceiling. Carefully cut the opening following these markings, ensuring precision.
4. Secure the Fan Unit:
Mount the fan unit onto the housing brackets, securing it firmly. Connect the ductwork to the fan, leading it towards the exterior for effective air expulsion.
5. Electrical Wiring:
Follow the manufacturer’s instructions for electrical connections. Typically, this involves connecting the wires securely and positioning the wiring in the electrical box.
6. Attach the Grille:
Place the fan grille over the installed unit, ensuring a snug fit. Secure it in place using the provided screws, giving your installation a polished finish.
7. Test the Fan:
Restore power to the bathroom and test the fan’s functionality. Confirm that it operates smoothly, effectively drawing out moisture and odors.
8. Seal Gaps and Insulate:
To enhance efficiency, seal any gaps around the fan with caulk. Additionally, insulate the ductwork to prevent condensation.
By following these clear instructions, you’ll successfully install your bathroom exhaust fan, contributing to a healthier, more comfortable living space.
Final Words
In wrapping up this comprehensive guide on how to install an exhaust fan in your bathroom, you’ve gained the expertise to enhance your home’s ventilation effortlessly. Now equipped with the knowledge to either replace or install a new exhaust fan, it’s clear that optimizing your bathroom’s air quality is within reach. Don’t hesitate to invest in this small yet impactful addition to your space.
Remember, the health of your bathroom air directly impacts your overall living environment. Take charge, install an exhaust fan, and enjoy a consistently fresh and pleasant atmosphere in your bathroom. Your home will thank you.
FAQs:
Q1. How do I determine the right size for my bathroom exhaust fan?
A1. To find the ideal exhaust fan size, calculate your bathroom’s cubic footage by multiplying its length, width, and height. Aim for a fan that can exchange the air every 8 to 10 minutes.
Q2. Can I install an exhaust fan without professional help?
A2. Certainly, installing an exhaust fan is a DIY-friendly task. Follow our step-by-step guide for a seamless process, ensuring proper ventilation and moisture control in your bathroom.
Q3. What maintenance is required for a bathroom exhaust fan?
A3. Regular cleaning is key. Wipe the fan blades, vacuum or dust the grille, and ensure the ductwork is free from debris. Perform these tasks annually to keep your exhaust fan operating efficiently.

